

CNC wood machining is the process of using computer-controlled routers or mills to cut, carve, and shape wood into accurate parts with repeatable quality. Standard setups achieve dimensional tolerances within +/- 0.005 inches, making this technology the foundation of modern furniture manufacturing, cabinetry production, and decorative carving. Switching from manual methods to CNC routing can increase production output by 3–5 times on repetitive tasks. That kind of efficiency gain explains why both small shops and large manufacturers have adopted CNC as their primary production method. Getting the most from this technology requires matching your tools, settings, and material preparation to the specific wood species you are cutting.
What is CNC wood machining and how does it work?
CNC wood machining uses G-code programs to direct a spindle along X, Y, and Z axes, removing material in controlled passes. The machine reads a digital toolpath generated in CAD/CAM software and executes it with far greater consistency than any hand tool. A single operator can run multiple parts simultaneously, which is why the technology scales so well for production environments.
The core advantage is repeatability. Once you dial in a working program for a cabinet door or a chair leg, every subsequent part comes out identical. CNC excels at complex joinery and repeat production, though it delivers less value for simple one-off cuts where setup time outweighs the benefit. Understanding that boundary helps you decide when to reach for the CNC and when a table saw or hand plane is the faster choice.
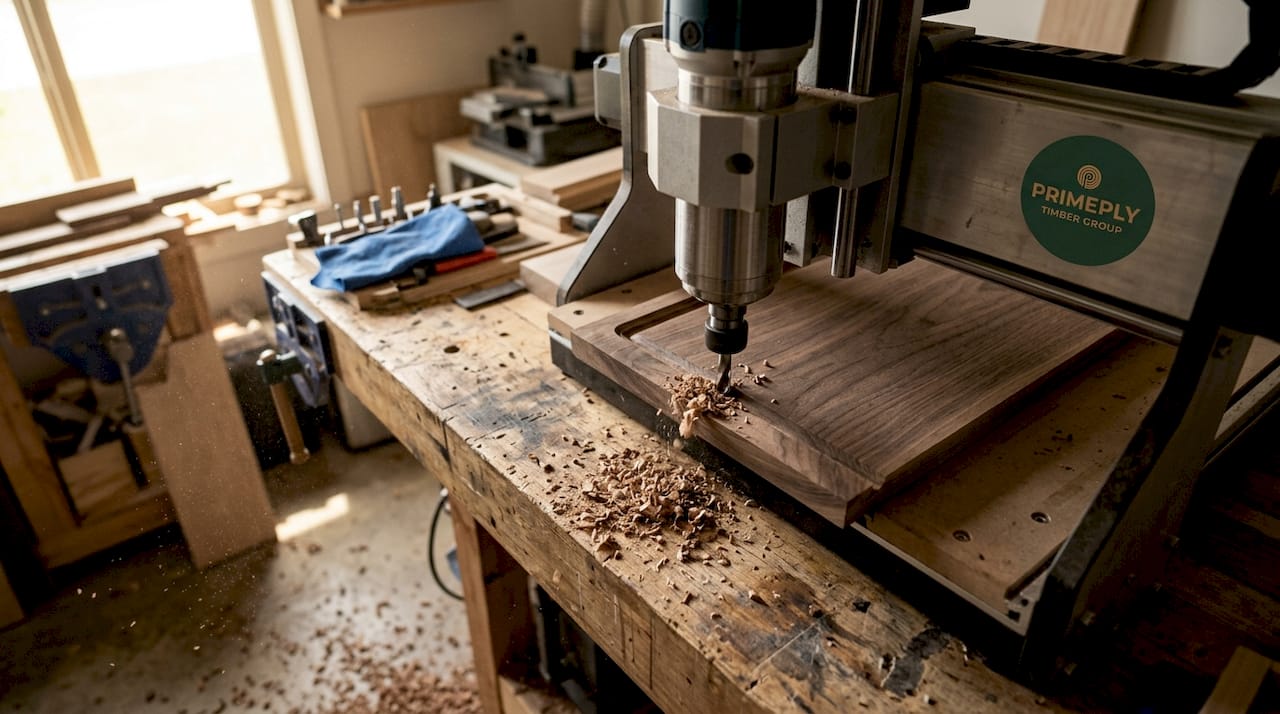
Common applications include flat-panel cabinetry, raised panel doors, decorative moldings, sign carving, and precision joinery such as box joints and mortise-and-tenon components. Each application demands different bit geometry, spindle speeds, and feed rates.
How to choose materials and tooling for CNC wood machining
Material selection is the first decision that shapes every downstream parameter. The four most common categories are solid hardwood, solid softwood, plywood, and MDF. Each behaves differently under a spinning router bit.
Hardwood vs. softwood: what changes at the machine
Hardwoods require conservative cutting parameters to reduce vibration, tool wear, and surface defects. Dense species like hard maple, white oak, and walnut generate more heat and resist the cutter more aggressively than softwoods. Softwoods like pine and cedar machine faster but present their own challenge: fuzzing, where loose fibers tear rather than cut cleanly. Sharp bits and well-tuned feed rates control that problem.
Plywood and MDF are sheet goods with consistent density, which makes them predictable. MDF machines cleanly but dulls bits faster than solid wood because of its abrasive resin content. Plywood’s alternating grain layers can cause tear-out at the top and bottom faces if you use the wrong bit geometry.
Choosing the right router bit
Three bit types cover most wood CNC routing work:
- Upcut spiral bits pull chips upward and out of the cut, keeping the flutes clear. They produce a clean bottom surface but can cause tear-out on the top face of the workpiece.
- Downcut spiral bits push chips downward, leaving a clean top surface. They are the right choice for laminated panels where the visible face is on top.
- Compression bits combine upcut and downcut flutes in a single tool. Compression bits prevent tear-out on both top and bottom surfaces when cutting through laminated or plywood materials. That dual action makes them the standard choice for cabinet shops cutting melamine-faced sheet goods.
Starting parameters by wood type
| Wood type | Recommended bit | Starting RPM | Feed rate (IPM) | Chip load (inches/tooth) |
|---|---|---|---|---|
| Hardwood (maple, oak) | 1/4" 2-flute carbide upcut | 16,000–18,000 | 80–120 | 0.003–0.004 |
| Softwood (pine, cedar) | 1/4" 2-flute carbide upcut | 18,000–20,000 | 100–140 | 0.004–0.006 |
| Plywood | Compression spiral | 16,000–18,000 | 90–120 | 0.003–0.005 |
| MDF | Downcut or compression | 18,000–20,000 | 100–130 | 0.003–0.004 |
These figures reflect recommended starting parameters for a 1/4-inch 2-flute carbide upcut bit in hardwood. Treat them as a starting point, then adjust based on chip formation and surface quality.
Pro Tip: Check moisture content before you cut. Moisture content ideally sits between 6–8% for interior hardwood projects. Wood above that range moves after machining, which throws off joinery tolerances and can warp finished parts.
Essential setup steps before you start cutting
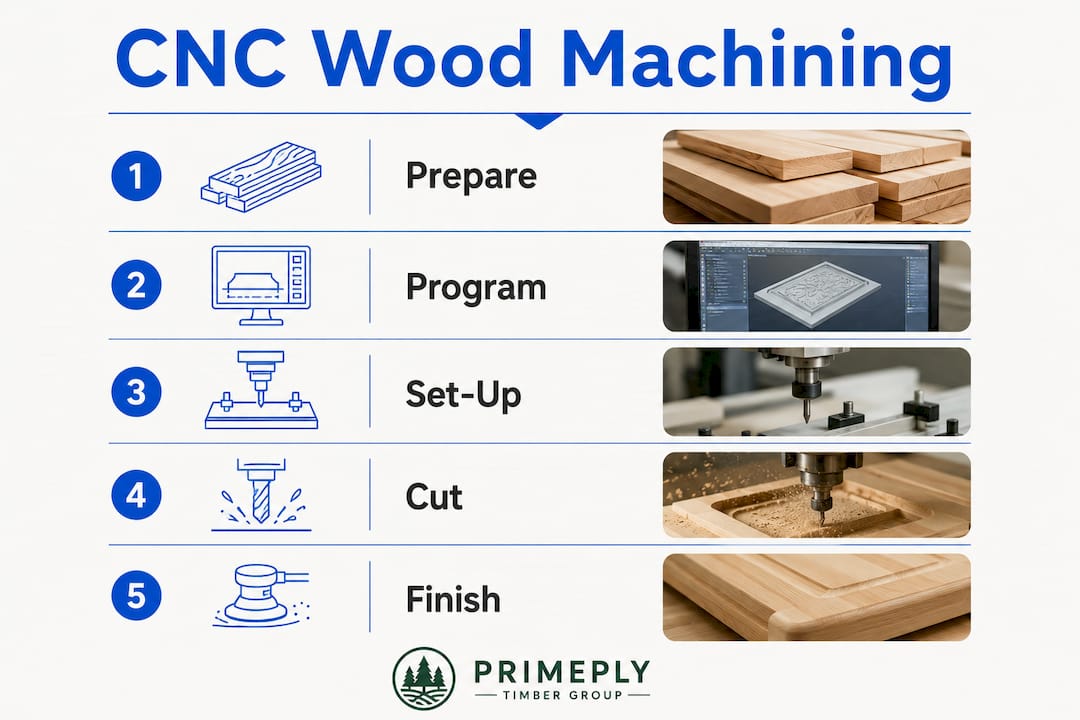
Proper preparation separates clean, repeatable results from frustrating rework. Skipping any of these steps introduces errors that no amount of parameter tuning can fix later.
- Mill your stock to S4S (surfaced four sides). Raw lumber has cupped, bowed, or twisted faces that prevent flat contact with the spoilboard. A jointer and planer bring the board to flat, parallel faces and square edges before it ever touches the CNC table.
- Measure moisture content. Use a pin-type or pinless moisture meter and confirm the reading falls in the 6–8% range. Boards outside that window should acclimate in your shop before machining.
- Secure the workpiece. Vacuum tables, T-track clamps, and double-sided tape each suit different part sizes and shapes. The workpiece must not shift under cutting forces. Any movement during a pass ruins the part and can break the bit.
- Zero the machine accurately. Set X, Y, and Z zero at a consistent reference point, typically the top-left corner of the workpiece and the top surface. Use a touch-off plate or a paper-slip method for Z-zero to get repeatable results across setups.
- Align toolpaths with grain direction in CAD. Routing with the grain yields cleaner cuts, while routing against the grain increases tear-out risk. Build that logic into your toolpath strategy before you post the G-code.
- Run a dry cycle first. With the spindle off, run the full program at cutting height to confirm the toolpath clears clamps, fixtures, and spoilboard edges. This step catches errors before they damage the machine or the material.
Pro Tip: Check machine rigidity before long production runs. Loose gantry bolts or worn linear bearings cause chatter that shows up as wavy surfaces on hardwood. Tighten fasteners and inspect bearings monthly. Also confirm your dust collection pulls enough CFM to keep chips clear of the cut zone. Chips left in the path act as a second cutting edge and degrade surface finish.
Step-by-step CNC wood cutting process and best practices
Executing a clean cut requires more than loading the program and pressing start. Each variable interacts with the others, and small adjustments make a measurable difference in surface quality.
Roughing passes vs. finishing passes
Roughing passes remove the bulk of material quickly at higher chip loads and deeper depths of cut. Finishing passes follow at a shallower depth, often 0.010–0.030 inches, to refine the surface. Running both pass types is standard practice for hardwood profiles and 3D carvings.
| Pass type | Depth of cut | Feed rate | Purpose |
|---|---|---|---|
| Roughing | 40–50% of bit diameter | Full recommended rate | Remove bulk material fast |
| Finishing | 0.010–0.030 inches | 10–20% slower | Achieve final surface quality |
Climb vs. conventional milling
Conventional milling moves the cutter against the direction of rotation, which is the safer default for most setups. Climb milling moves with the rotation and produces a cleaner surface on the final pass, but it requires a rigid machine and secure workholding to avoid grabbing. Use conventional milling for roughing and climb milling for the final finishing pass on hardwood profiles.
Minimizing common surface defects
Burn marks, tear-out, and fuzzing each have specific causes. Burn marks appear when the bit dwells too long in one spot, which happens with low feed rates or dull tools. Increase feed rate or replace the bit. Tear-out on the top face calls for a downcut or compression bit. Fuzzing on softwood means the bit is dull or the feed rate is too low for the RPM.
Multiple light passes outperform a single heavy cut on hardwood. Each pass generates less heat, reduces deflection in the bit, and leaves a cleaner surface for the finishing pass.
Pro Tip: Watch your chips. Fine wood powder during cutting signals excessive tool wear or overheating. Good cuts produce distinct chip flakes. Powder means the bit is rubbing rather than cutting. Replace the bit or increase feed rate before continuing.
Post-machining, sand with 120-grit to remove any remaining fuzz, then progress to 180-grit before applying finish. Dust extraction during cutting is not optional. Beyond safety, chips left in the cut zone degrade surface finish and can cause the bit to deflect.
Common CNC wood machining challenges and how to fix them
Even well-configured machines produce defects when parameters drift or materials change. Knowing the cause of each symptom speeds up diagnosis.
Burn marks:
- Cause: Feed rate too low, dull bit, or spindle dwelling at a corner
- Fix: Increase feed rate by 10–15%, replace the bit, or add corner rounding in the toolpath
Top-surface tear-out:
- Cause: Upcut bit on laminated or plywood material
- Fix: Switch to a downcut or compression bit
Bottom-surface tear-out:
- Cause: Downcut bit on solid wood with no backing board
- Fix: Use a compression bit or add a sacrificial backer under the workpiece
Fuzzing on softwood:
- Cause: Dull bit or feed rate too low relative to RPM
- Fix: Replace the bit and increase feed rate to raise chip load
Part movement during cutting:
- Cause: Inadequate workholding or vacuum leak
- Fix: Add mechanical clamps, check vacuum seals, or use double-sided tape for small parts
Tool wear accelerating faster than expected:
- Cause: MDF or resin-heavy plywood dulling carbide faster than solid wood
- Fix: Switch to a higher-grade carbide bit rated for abrasive materials, or reduce depth of cut per pass
Treating all woods identically is a common beginner mistake. Customizing feed rates and tooling for each species is the single most effective way to improve cut quality across your shop.
For complex joinery, parametric CAD designs that include tolerance for wood movement prevent cracks and failed joints. A clearance of 0.015 inches on a tenon, for example, accommodates seasonal expansion without loosening the joint.
Key takeaways
CNC wood machining delivers repeatable precision only when material preparation, tooling selection, and parameter settings are matched to the specific wood species being cut.
| Point | Details |
|---|---|
| Tolerance and output | Standard CNC setups hold +/- 0.005-inch tolerances and can triple to quintuple manual production output. |
| Bit selection by material | Use compression bits for plywood and laminate, upcut bits for solid hardwood roughing, and downcut bits for clean top surfaces. |
| Moisture content matters | Target 6–8% moisture content before machining to prevent warping and joinery failure after the cut. |
| Chip formation is your diagnostic | Powder means the bit is rubbing; distinct flakes mean the bit is cutting correctly. |
| Grain direction in CAD | Align toolpaths with grain direction at the design stage to reduce tear-out and improve surface finish. |
What I’ve learned after years at the CNC table
The biggest mistake I see from woodworkers moving to CNC is treating the machine like a magic box. They load a program, press start, and expect perfect parts. When something goes wrong, they adjust the CAD file instead of the parameters. That backward approach wastes material and time.
The real skill in CNC woodworking is reading what the machine tells you. Chip formation, surface texture, and spindle sound all carry information. A high-pitched whine usually means the feed rate is too low for the RPM. A rough, torn surface on oak almost always points to routing against the grain. Once you learn to read those signals, troubleshooting takes minutes instead of hours.
I also think CNC gets undersold as a creativity tool. The common narrative is that it replaces craftsmanship. My experience is the opposite. When the machine handles repetitive cuts, I have more shop time for joinery design, finishing work, and prototyping ideas that would take days by hand. The engineered wood products I source for production runs machine consistently because they are kiln-dried and dimensionally stable. That consistency is what makes tight tolerances achievable in the first place.
One more thing: do not skip the dry run. Every experienced CNC operator I know runs a dry cycle before every new program. It takes two minutes and has saved me from crashing a bit into a clamp more times than I want to count.
— John
Quality materials make CNC results repeatable
The best toolpaths and parameters only work when the wood underneath is consistent. Warped boards, high moisture content, and variable density all introduce errors that no program can compensate for.

Woodproducts supplies kiln-dried, dimensionally stable timber engineered for construction and manufacturing applications. Their product lines are designed to meet the demands of CNC production environments, where consistent density and low moisture content directly affect cut quality and part accuracy. Builders, furniture manufacturers, and distributors rely on Woodproducts for materials that hold tight tolerances from the first part to the thousandth. Visit Woodproducts to review product specifications and find the right engineered wood for your next CNC project.
FAQ
What is CNC wood machining?
CNC wood machining is the use of computer-controlled routers or mills to cut, carve, and shape wood with repeatable accuracy. Standard setups hold tolerances within +/- 0.005 inches.
What wood types work best for CNC routing?
Hardwoods like maple and oak, softwoods like pine, MDF, and plywood all machine well on a CNC router. Each requires different bit geometry and feed rate settings to achieve a clean surface.
How do I prevent burn marks on hardwood?
Burn marks result from low feed rates, dull bits, or spindle dwell at corners. Increase your feed rate by 10–15%, replace worn bits regularly, and add corner rounding in your toolpath to eliminate dwell points.
What moisture content should wood have before CNC machining?
Wood for interior hardwood projects should measure 6–8% moisture content before machining. Higher moisture causes the wood to move after cutting, which throws off joinery tolerances and can warp finished parts.
When does CNC machining make sense vs. hand tools?
CNC delivers the most value on complex joinery, repeat production runs, and parts requiring tight tolerances. Simple one-off cuts where setup time exceeds cutting time are often faster with hand tools or a table saw.